Sailor's Step-by-Step Guide Restores Faded Aluminum Deck Hatches Affordably
Faded Lewmar and Bomar hatches from the 70s and 80s don't need replacing; a strip-and-refinish approach brings them back affordably.

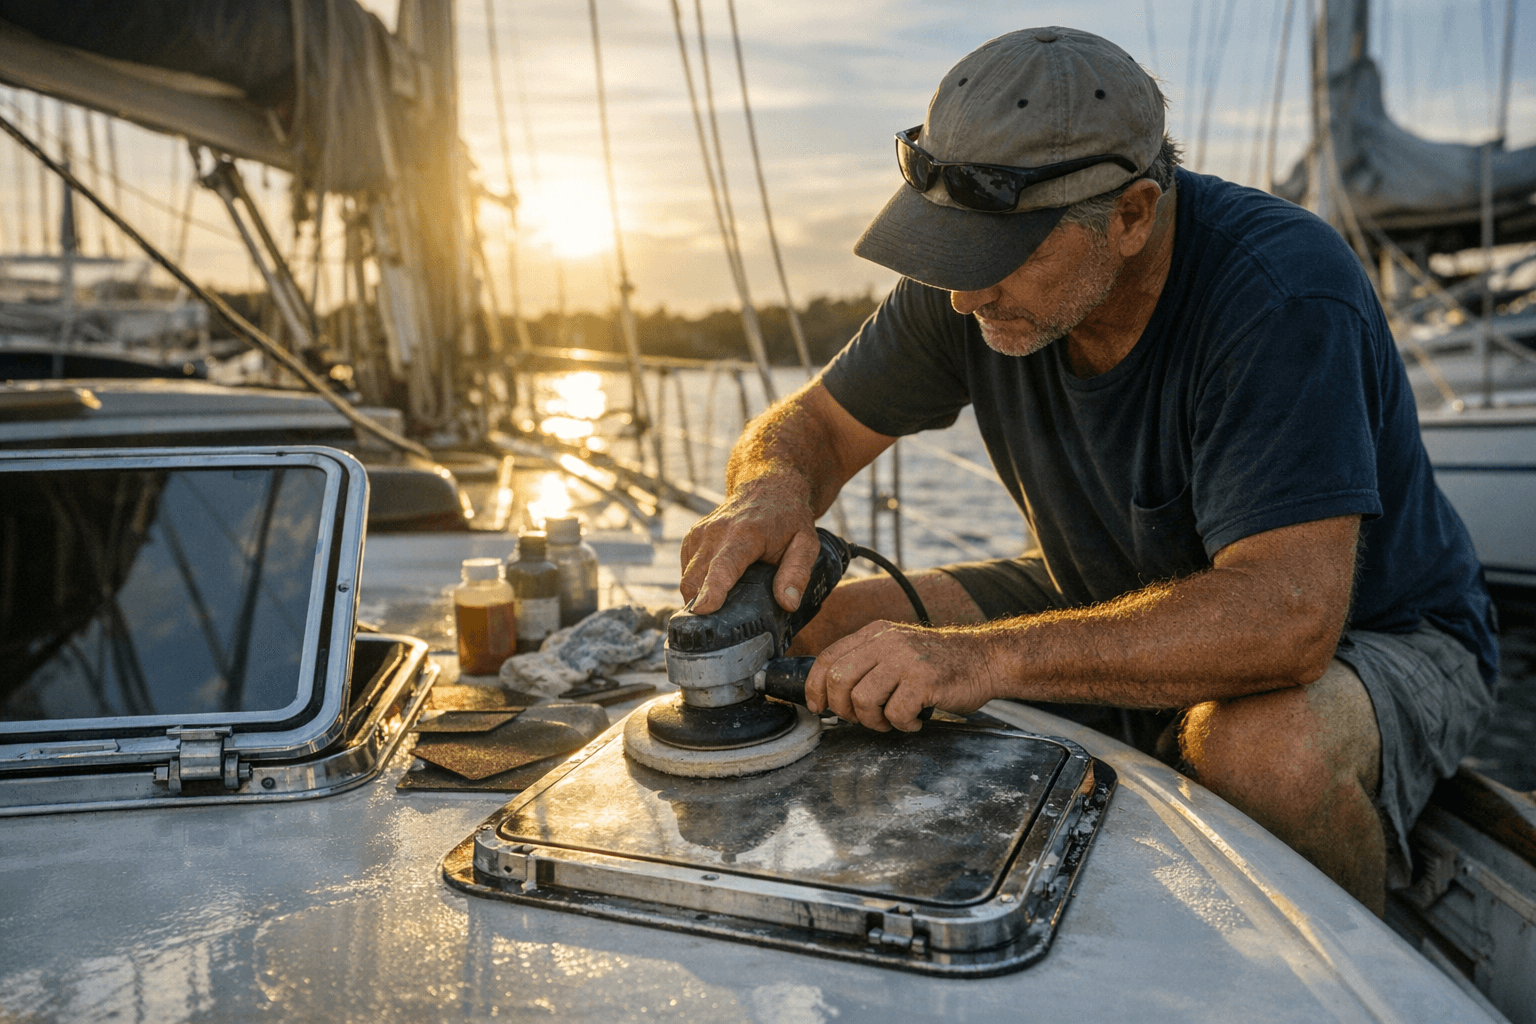
Oxidized aluminum is one of those problems that sneaks up on you. The hatch that once gleamed above the v-berth is now chalky, the frame pitted, the acrylic lens hazed to a milky translucence. Replacing a quality Lewmar or Bomar hatch isn't cheap, and on a production boat from the 1970s or 1980s, you may be looking at a unit that outlasted everything else on deck. Throwing it away feels wrong. Bert Vermeer, a long-time coastal cruiser, hands-on boatowner, and marine business operator who documents practical refit projects, makes the case that it is wrong: with the right process, those hatches can be stripped, refinished, and reinstalled for a fraction of replacement cost.
Vermeer's guide, published by Practical Sailor under the title "Refurbishing Aluminum Deck Hatches: A DIY Guide," lays out a step-by-step approach for restoring faded aluminum deck hatches affordably. The focus throughout is on the Lewmar and Bomar hatches that equipped so many production boats of that era, the kind of hardware that was built to last and, with some attention, still can.
Why These Hatches Are Worth Saving
The aluminum deck hatch had its heyday on production boats built through the 1970s and 1980s, a period when both power and sail manufacturers specified them as standard equipment. Some yards fabricated hatches in-house, but the dominant names were Lewmar and Bomar, established hardware companies whose products ended up on thousands of hulls. Decades later, those hatches are still out there, still functional in their bones, even if the surface finish has surrendered to UV exposure, salt, and time.
The original frame finish options covered the spectrum of what was practical for production: anodized aluminum, powder-coated finishes, or simply painted frames. Each was paired with a clear or tinted acrylic lens. Anodizing offered the best long-term corrosion resistance, but even anodized frames can oxidize and lose their luster after forty-plus years of offshore exposure. Powder coat can chip and peel where hardware contacts it; painted frames are the most vulnerable of the three. Knowing which finish you're starting with matters because it shapes how you approach the strip.
Profiles, Lips, and the Question of Stepping on Hatches
Not all aluminum hatches of this period were built to the same profile. Styles ranged from low-profile units that sit nearly flush with the deck to high-profile hatches with a pronounced raised frame and, critically, a significant lip around the perimeter. That lip isn't decorative: it exists to create a solid seal when a wave sweeps across the deck, which on a bluewater passage is not a hypothetical scenario but a regular occurrence.
The practical note Vermeer includes about stepping on hatches is one of those details that separates a guide written by someone who actually sails from one written at a desk. Deck hatches were not designed to be stood on. The acrylic lens in particular is a stress fracture waiting to happen under concentrated load. That said, a quality hatch and lens can and does take that punishment when crew are scrambling on deck in a seaway. The distinction matters for the refurbishment: if your lens shows stress crazing around the edges, that's worth assessing before you invest time in refinishing the frame.
What the Refurbishment Process Covers
Vermeer's guide addresses the full arc of the project: stripping old finishes, surface preparation, refinishing, and reinstalling the hatch. That sequence is the spine of any successful aluminum restoration, and each stage is where amateur jobs most commonly go wrong.
Stripping is where patience pays off. The goal is to get back to clean, bare aluminum without gouging or pitting the frame further. Surface prep follows: the aluminum needs to be properly prepared before any new coating is applied, or the new finish will fail just as the old one did, often faster. Refinishing involves selecting and applying the appropriate coating for the frame type, which on an aluminum hatch exposed to UV and salt requires serious consideration. Reinstallation closes the loop, returning the hatch to the deck with proper sealing and hardware so it functions as intended.
The Case for DIY on a Classic Hatch
Lewmar and Bomar hatches from the production era have something going for them that modern budget replacements often don't: they were built with heavier extrusions, better hardware, and frames substantial enough to machine and rework. A comparable replacement hatch from a quality manufacturer today carries a price tag that can run into several hundred dollars per unit, and a larger boat may carry four, six, or more hatches. The economics of refurbishment become obvious quickly.
There is also the fit question. Deck cutouts on older production boats were sized to the hatches of their era. Sourcing a modern replacement that drops into a 1978 cutout without modification ranges from difficult to impossible depending on the model. Refurbishing the original avoids that problem entirely.
Vermeer's background as both a coastal cruiser and a marine business operator gives his approach credibility on both sides of the equation: he understands what the hatch has to withstand offshore, and he understands the economics of keeping an older boat in service without spending like a new-boat buyer. The guide is positioned squarely at the owner who wants to do the work themselves, do it correctly, and end up with a result that lasts.
Before You Start: Know What You Have
The first diagnostic step is identifying your frame finish type, because stripping anodized aluminum, powder coat, and paint each calls for a different approach. Anodized finishes are part of the aluminum surface itself, not a coating sitting on top of it, which changes the chemistry of what "stripping" means. Powder coat is a baked-on polymer and responds to different solvents than conventional paint. Getting this wrong at the stripping stage creates more work downstream, not less.
The acrylic lens deserves a separate assessment. Clear or tinted, the lens is the most UV-vulnerable component of the assembly. Hazing and yellowing are cosmetic problems that can often be polished out. Crazing and stress cracks are structural concerns. If the lens is beyond polish, replacement acrylic is available and the swap is typically straightforward once the frame is off the boat.
Check the profile type before disassembly. High-profile hatches with the sealing lip require careful attention during reinstallation to ensure the gasket seats correctly and the lip does its job. A poorly reinstalled high-profile hatch is worse than a faded one: it looks right but leaks.
The Longer Game
Production-era aluminum hatches are not going to get cheaper to source as replacements, and they are not going to become less common on the boats that are in active use in the cruising fleet today. A 1982 sloop with original Bomar hatches has been sailing for over forty years; with proper maintenance, those same hatches could sail another forty. Vermeer's guide makes that outcome more achievable for the owner willing to put in the bench time. The aluminum is still there underneath the oxidation. The question is whether you're willing to get it back.
This article was produced by Prism’s automated news system from verified source data, official records, and press releases, then run through automated quality and moderation checks before publishing. The system is built and supervised by the people who set the standards it runs under. Read our full AI policy.
Did this article answer your question?


