How to Bake Sourdough Bread with Levain, Step by Step
Syncing your levain build and autolyse to finish at the same moment is the scheduling insight that separates predictable sourdough from perpetual guesswork.

The difference between a sourdough loaf that works every time and one that keeps surprising you in the wrong ways often comes down to a single decision made hours before mixing: whether you're building a dedicated levain or improvising with starter straight from the jar. A levain, the preferment at the heart of this method, shifts the entire dynamic of the bake. It gives you a known quantity, at a known stage of activity, with a predictable fermentation window. That control is what this guide is built around.
What a Levain Actually Does
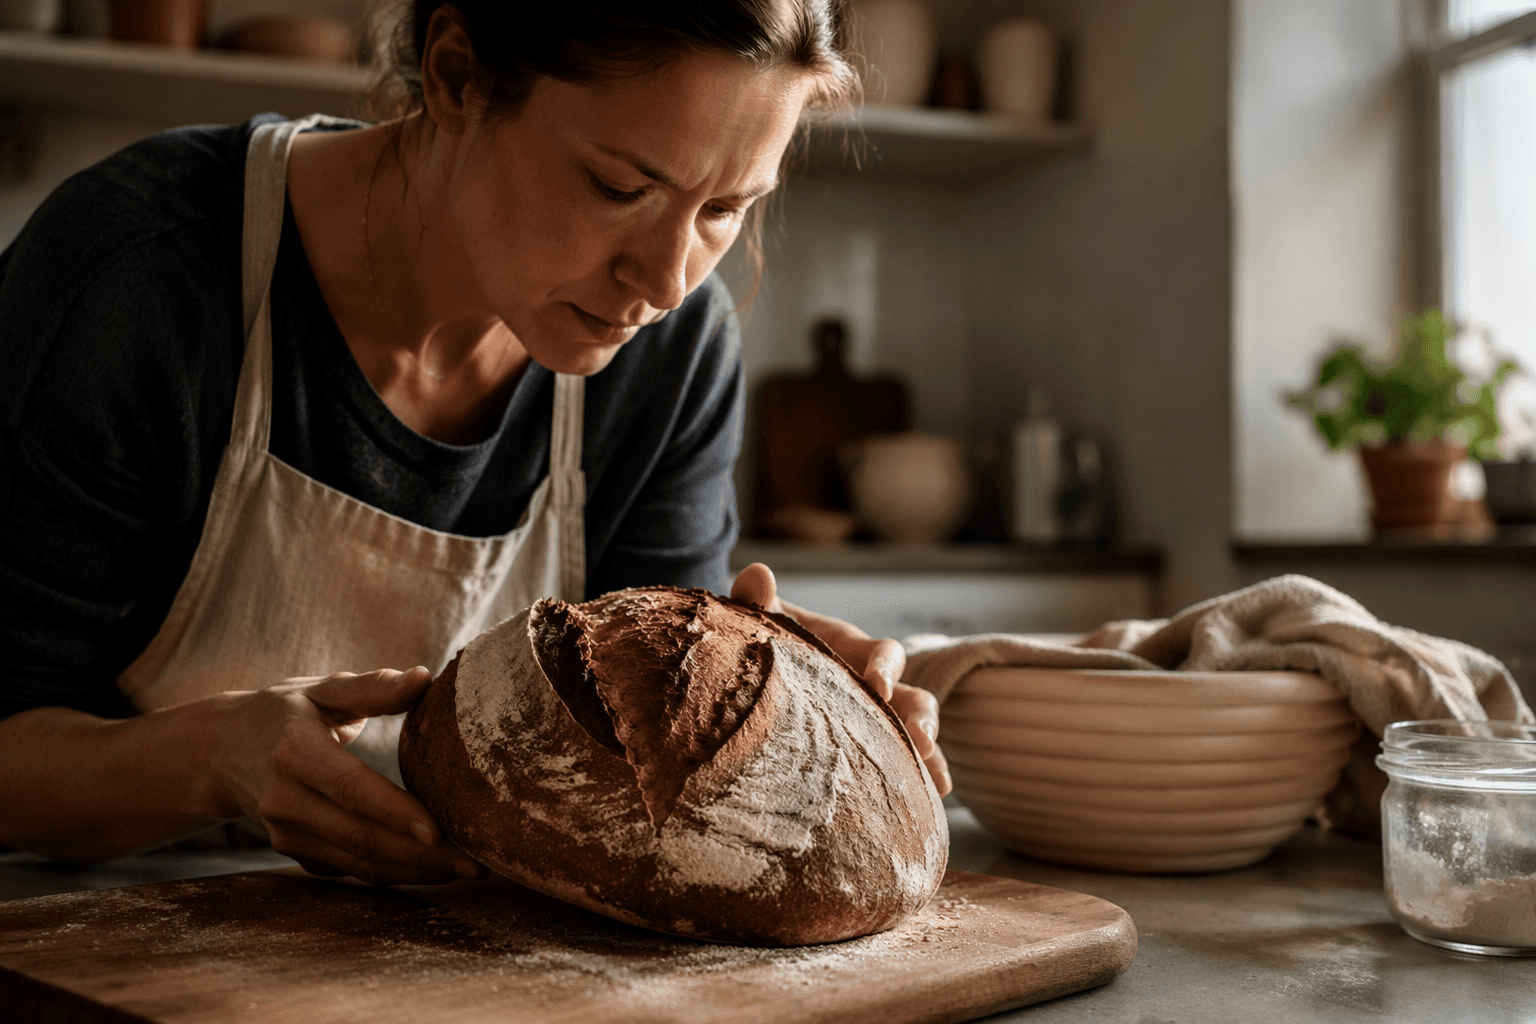
A levain is not simply starter by another name. It is a fresh preferment built from a measured portion of your starter combined with flour and water, then allowed to ripen independently before it joins the main dough. Because you're working with specific weights and a clean fermentation cycle, the levain delivers a more consistent rise than adding starter directly. When it peaks, it peaks predictably. When it peaks, it has also developed a flavour complexity that younger, less active starter can't match. The target visual is unambiguous: a domed surface, vigorous bubbling, and a volume roughly double what you started with.
Building the Levain and Timing the Autolyse
Build your levain 4 to 6 hours before you plan to mix your dough. At a moderate room temperature, expect it to reach peak activity in approximately 5 hours; stir the ingredients together, cover the vessel, and then leave it alone. A levain that has risen and begun to recede is a levain that has passed its window, so this is a timing game worth taking seriously.
Here is the scheduling move that makes this method click: begin your autolyse roughly 2 hours before your levain is due to peak. That way, both the levain and the autolyse finish simultaneously, and you move straight from one preparation phase directly into the next without interruption or delay.
The autolyse itself is a 2-hour rest of flour and water, nothing else. No levain, no salt, no starter. Mixing those two ingredients and allowing them to sit undisturbed gives the proteins time to hydrate and begin forming gluten bonds entirely on their own. The dough that emerges from autolyse is noticeably more extensible than dough mixed and immediately worked; it stretches without tearing, which makes every subsequent fold cleaner and produces a more open crumb structure during baking. For bakers who regularly fight dough that resists stretching or tears during shaping, extending the autolyse duration is one of the most direct adjustments available.
Salt Incorporation and Coil Folds
When both the autolyse and the levain are ready, bring them together with the addition of salt. Salt tightens gluten and slightly moderates fermentation speed, giving you a useful buffer as the dough enters the bulk fermentation phase ahead. Rather than kneading at this point, the method calls for three rounds of coil folds with 15-minute rests between each set.
Coil folds work by building tension gradually and gently. Lift the center of the dough upward, allow the ends to fall and tuck underneath by their own weight, rotate the vessel 90 degrees, and repeat the motion. Three passes spaced 15 minutes apart are sufficient to develop the structure the dough needs. The deliberate restraint here matters: aggressive handling at this stage would degas the dough and interrupt the early microbial activity that is just beginning to accelerate. Gentle folds preserve those developing gas cells while steadily increasing strength.
Bulk Fermentation
After the folds, the dough settles into bulk fermentation, the extended, largely hands-off phase where wild yeast and lactic acid bacteria complete most of their work. The target window is 4 to 5 hours at a moderate room temperature. This range is not arbitrary; it reflects a dough that is active enough to rise meaningfully without overshooting into an over-fermented state where the gluten network weakens and the loaf flattens.
Temperature is the key variable. A warmer kitchen compresses that window; a cooler room stretches it. Rather than watching the clock exclusively, watch the dough: it should increase noticeably in volume, feel light and airy when gently pressed from the side, and hold a soft dome in the vessel. Dough that hasn't risen enough produces a dense, gummy crumb; dough that has gone too far becomes slack, tacky, and difficult to shape without tearing.
Shaping and the Proofing Decision
Shaping after bulk fermentation is about creating surface tension without collapsing the gas structure built during fermentation. A well-tensioned loaf holds its form from the bench to the banneton to the oven, and that tension is what gives the crust its ear and the crumb its structure.
After shaping, the proofing decision splits the process in two directions. A room-temperature final proof suits bakers completing the bake in one session. Cold retarding in the refrigerator, typically overnight, is the route to a more complex flavour profile, a more pronounced crust, and a loaf that is significantly easier to score: the cold dough is firmer, holds its shape under the blade, and produces a cleaner, more defined cut. The extended cool fermentation deepens acidity and develops notes that a same-day bake simply cannot match.
The Cues That Tell You When to Bake
Two tactile and visual signals confirm readiness at each key stage. For the levain: a domed, actively bubbly surface and a volume that has doubled. A levain whose surface has turned concave or flat has peaked and passed; using it at this stage risks unpredictable or sluggish fermentation in the main dough.
For the proofed loaf: the finger-poke test. Press a floured finger gently into the surface. An indentation that springs back slowly and partially indicates active fermentation and a loaf ready for the oven. Immediate, full spring-back signals underproofing; an impression that holds its shape without recovering at all signals overproofing. Neither timer nor recipe substitutes for this test, and experienced bakers learn to trust it over rigid schedules.
Adjusting Deliberately
The deeper value of understanding each stage is that adjustments become experiments rather than accidents. A longer autolyse improves extensibility in tighter flours. A cooler, slower secondary proof deepens sourness. A warmer levain environment accelerates peak timing. Each variable has a predictable effect, which means every bake that doesn't quite land gives you a specific dial to turn on the next one. That shift, from following a recipe to understanding its mechanics, is what makes levain-based sourdough one of the most technically satisfying practices in home baking.
This article was produced by Prism’s automated news system from verified source data, official records, and press releases, then run through automated quality and moderation checks before publishing. The system is built and supervised by the people who set the standards it runs under. Read our full AI policy.
Did this article answer your question?