Beginner's Guide to Multi‑Color and Multi‑Material FDM Printing
Learn the practical paths to multi-color and multi-material FDM prints, how each system works, and beginner steps to set up clean swaps and functional parts.
Multi-color and multi-material printing opens new creative and functional doors, but each approach brings trade-offs in complexity, waste, and reliability. Below I lay out the common hardware routes, then walk through hands-on tips you can use right away.
1. Single-nozzle multi-filament units (MMU-style filament changers)
Single-nozzle systems swap filaments into one hotend so the same nozzle prints all colors or materials. They keep hardware simple and avoid tool-change alignment, but they require careful filament path management and suffer from waste during purges when the hotend is cleared between colors. Expect more stringing and calibration work around retraction and filament runout handling; the payoff is lower cost and compact setups that work well for decorative, non-functional parts.
2. Filament-splicing/merging add-ons (Palette-style color/filament combiners)
Splicers cut and join filament segments to form a single multi-color feed, letting a single hotend print blended sequences without mechanical switching. These devices reduce some purge waste compared with naive swaps but demand tight calibration of feed lengths and consistent filament diameter; inconsistent joins or weak splices cause jams or print defects. Use splicer-integrated software profiles and test pieces to dial in timing; they're great for colorful figurines and gradients where mechanical complexity is undesirable.
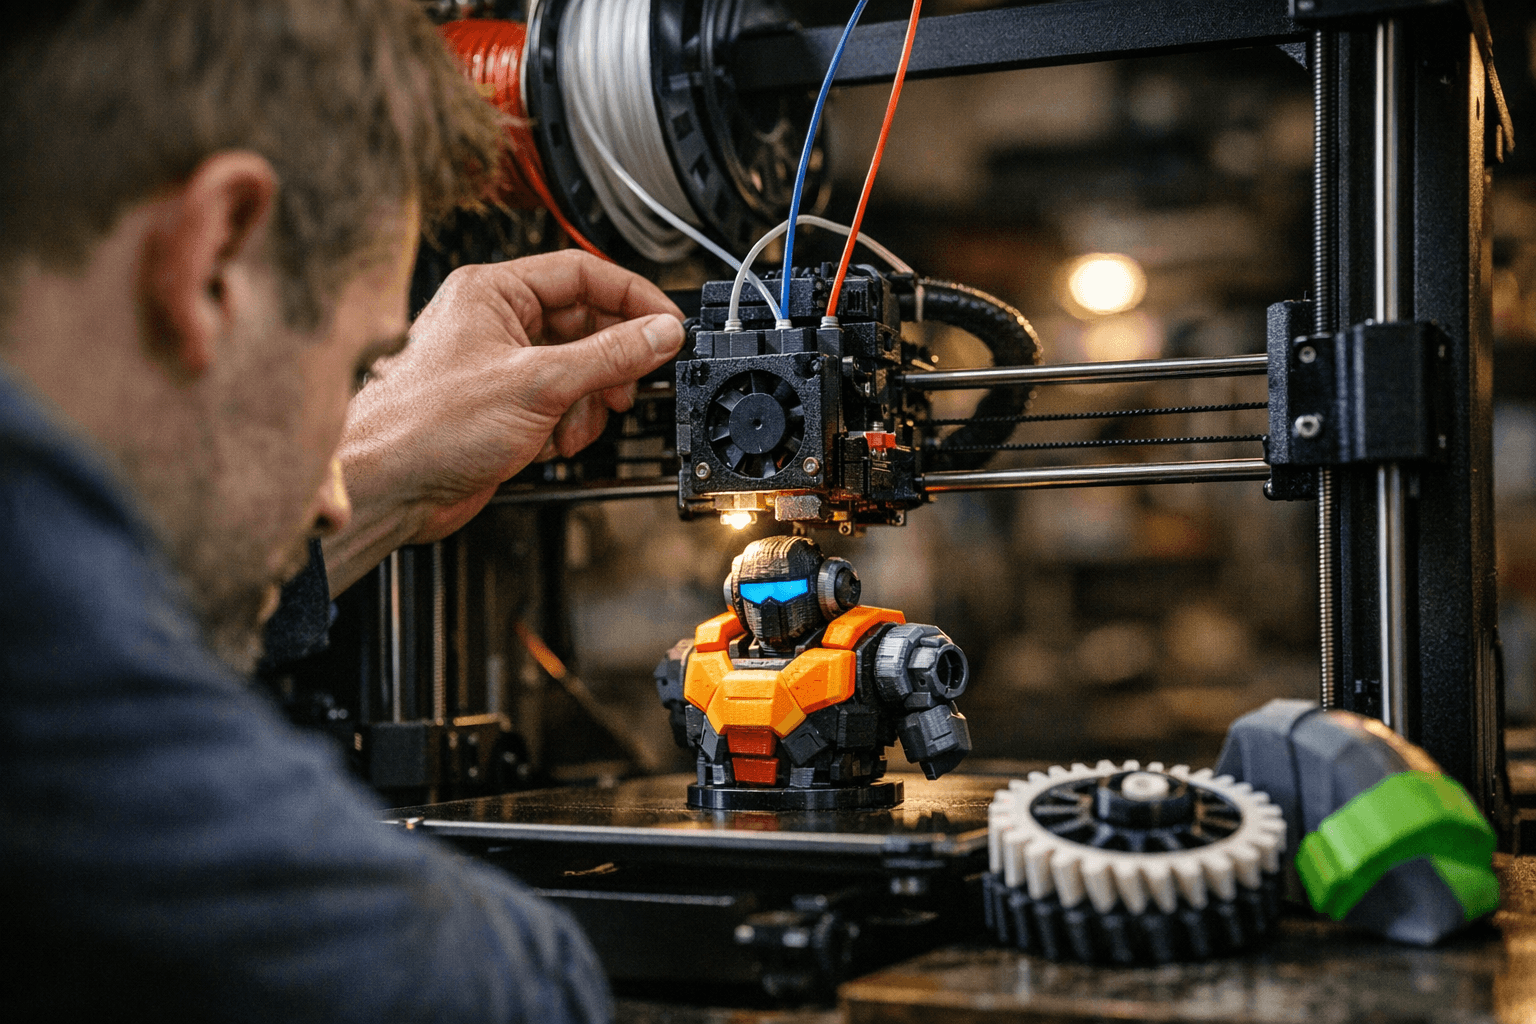
3. Multiple independent extruders (direct-drive or multi-nozzle toolheads)
Multi-extruder setups give each material its own hotend and often independent drive motors, preserving material properties and enabling simultaneous toolpaths with minimal cross-contamination. They excel for functional prints mixing rigid and flexible plastics because each extruder can be tuned to that filament's needs; however, they require hardware alignment, slicer support for tool changes, and sometimes more complex maintenance. If you need clean interfaces between materials (e.g., TPU bonded to PETG), this is the professional-leaning choice in community projects.
4. Start with simple color-swap test prints and ensure good retraction and prime towers to avoid stringing
Begin by printing small calibration blocks that exercise single-layer swaps and color transitions; these tests reveal ooze and stringing behavior without wasting large prints. Optimize retraction, print temperature, and travel moves during these tests, and use prime/wipe towers to catch color bleed before it appears on the model. Community test files (two-color cubes, thin walls) are quick ways to iterate settings and share results on forums for feedback.
5. Use similar melting-temperature materials together (PLA with PLA)
Pairing materials with similar melt ranges prevents long, messy purges and reduces stress on hotends during tool changes; mixing PLA and ABS or PLA and TPU without planning typically leads to poor purging and adhesion problems. When you must combine dissimilar materials (rigid+flexible), choose multi-extruder systems where each hotend stays at its optimal temperature, or accept additional purge volumes and design join geometries that accommodate the mismatch. This tip saves time and failed prints when you move from color experiments to functional parts.
6. Calibrate purge lengths and priming routines for clean tool changes
Every system needs a baseline purge length that ensures new color arrives at the nozzle before printing resumes; too short and you get contamination, too long and you waste filament and time. Run stepwise tests to find the minimal effective purge for your hotend, filament, and toolpath; log the values, and create profiles so slicer-driven changes are repeatable. For MMUs and splicers, watch for lag in filament movement, mechanical tolerances translate into extra purge length.
7. Design or use slicer profiles that include wipe/prime tower strategies
Modern slicers offer wipe towers, prime pillars, and ooze shields, choose the strategy that balances surface cleanliness with filament waste for your project. Create profiles that place towers discretely or use skirt-based priming if models are small; for complex color maps, slice previews let you verify tower timing versus the model to prevent color misplacement. Share working profiles with the community and use their profiles as starting points, it accelerates learning and avoids reinventing common fixes.
8. Accept a modest time and material penalty for color/multi-material prints and plan for extra postprocessing
Multi-material prints involve extra tool changes, longer print times, and purge filament, so factor that into project planning and part costing. Expect small blemishes at color boundaries and plan sanding, filing, or painting as part of finishing workflows; sometimes masking and a touch-up pass are quicker than chasing perfect machine settings. Embracing the overhead keeps expectations realistic and reduces frustration when prints take longer than single-filament runs.
9. For functional multi-material parts (rigid + flexible) prefer multi-extruder systems with dedicated hotends and independent drive motors to preserve material properties
When strength, flexibility, or chemical resistance matter, give each material its own hotend and drive system so extrusion force, temperature, and retraction suit the filament. Independent extruders prevent flexible filament from being pulled through long Bowden paths and avoid heat soak from adjacent hotends that can soften sensitive plastics. This approach mirrors many community-built solutions for wearables, gaskets, or assemblies, and is the one most likely to produce parts that meet mechanical specs.
Practical wrap-up: start small, document settings, and iterate. Run simple swaps, save working purge and tower profiles, and graduate to splicers or extra extruders only once you understand the trade-offs. Community threads and shared profiles will shorten your learning curve, bring your patience, calibrate methodically, and you’ll turn color experiments into reliable multi-material prints.
Know something we missed? Have a correction or additional information?
Submit a Tip

