Essential Toolkit and Checklist for New Custom Mechanical Keyboard Builders
Set up a compact toolkit and follow a checklist to avoid common pitfalls when building your first custom mechanical keyboard.

You can save time and frustration on your first custom mechanical keyboard by assembling a compact toolkit that covers essential hand tools, diagnostics, and a few basic mods. If you’re ready to move from factory boards to a custom mechanical keyboard, start with one clear goal: define the experience you want, and let layout and feel guide purchases.
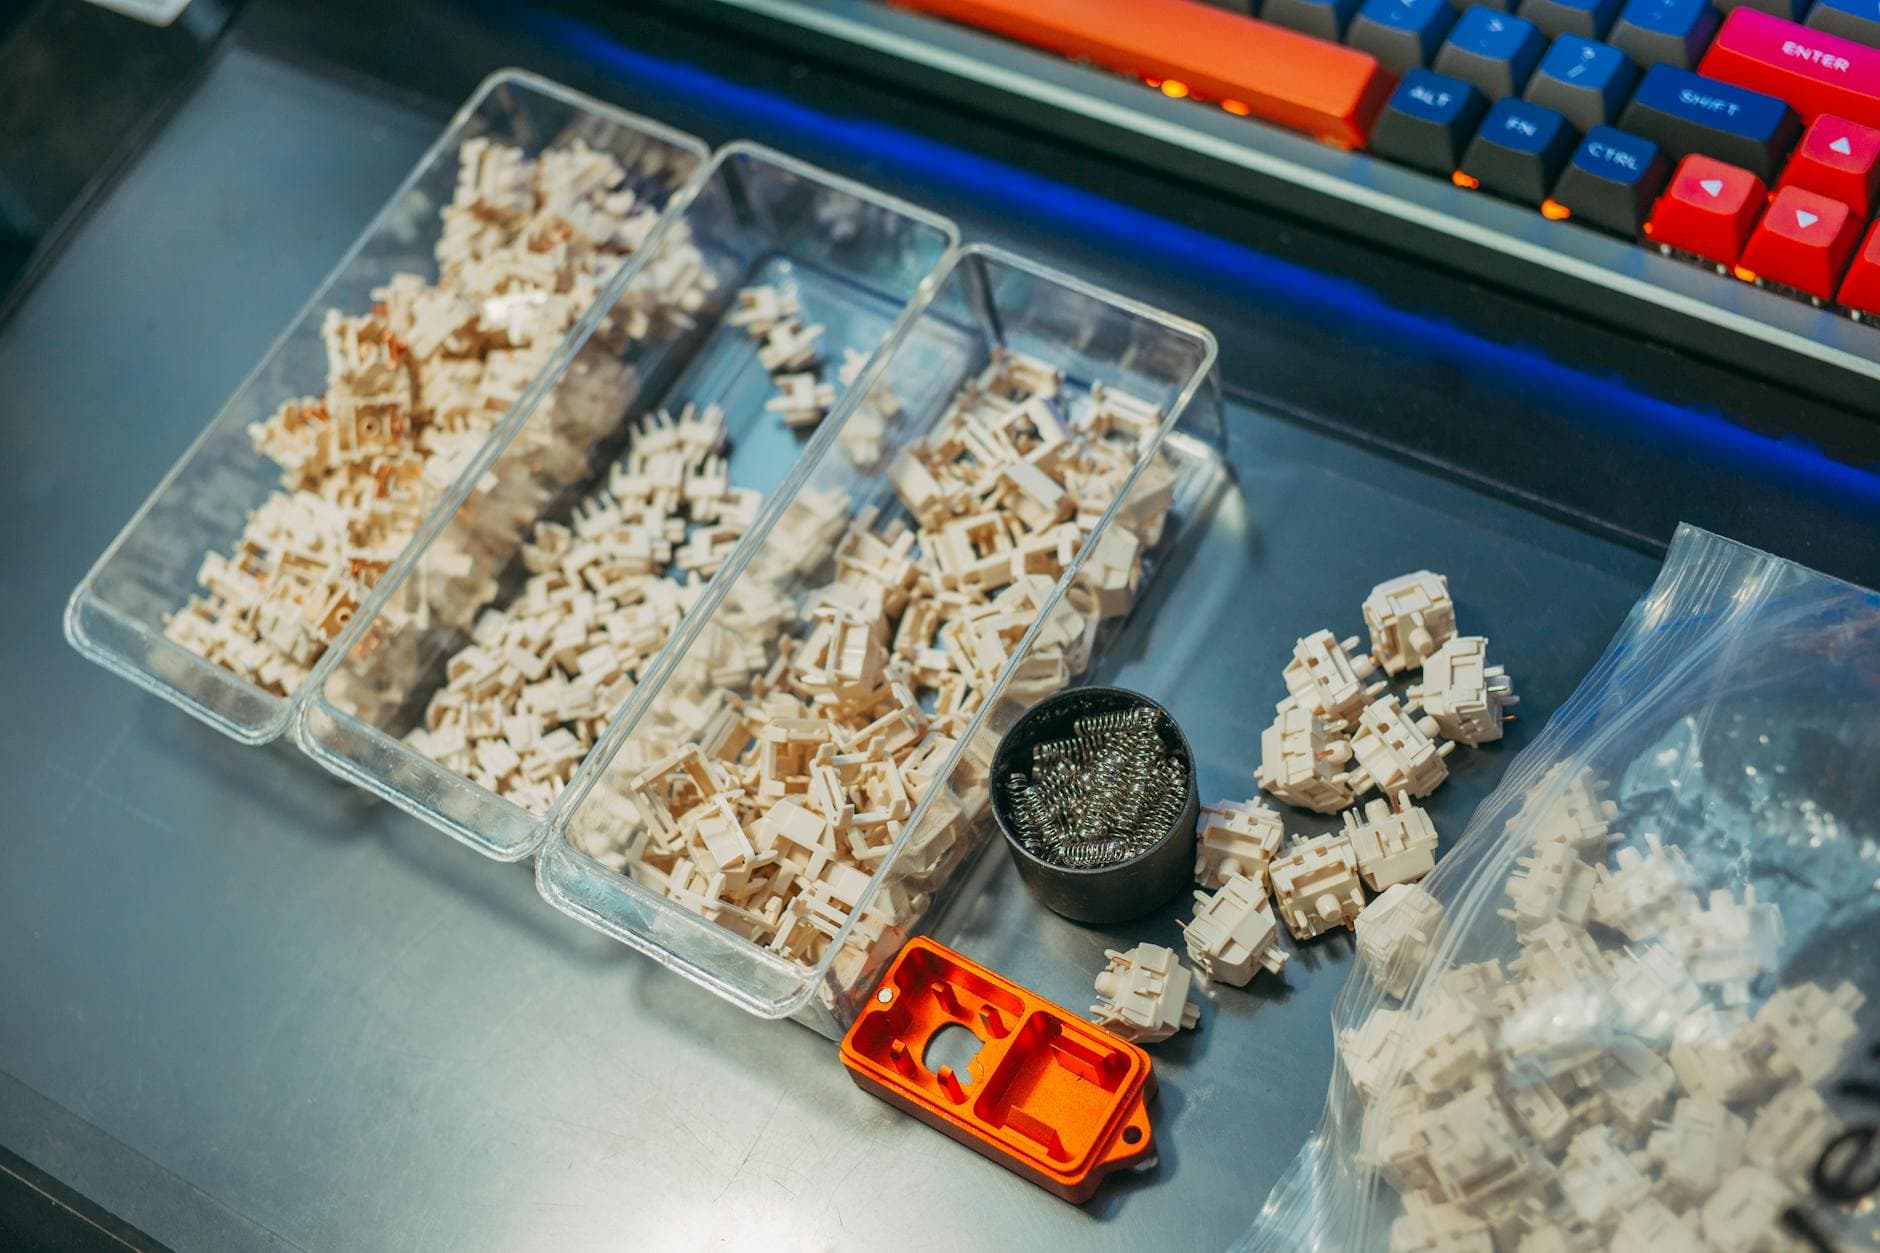
Start with a tiny essentials kit that covers the fiddly bits. Evergreen lists core items in plain terms: "Essential hand tools: precision screwdriver set (Phillips + hex/Allen), flush side cutters for switch stems and wires, angled tweezers". Those three tools handle most early-stage tasks: opening cases, trimming switch pins, and positioning small parts. Add a switch puller and keycap puller, a small screwdriver set, and tweezers for switch-level work.
Move next to diagnostics and soldering choices. Decide whether you want a hot-swap PCB or a soldered PCB, because hot-swap removes the need for a soldering iron. Khstats is blunt: "Unless you get a hot swap PCB, you’ll need a soldering iron, solder wire, something to remove excess solder (i.e. solder wick or sucker)." Before soldering or inserting switches, test the PCB with software: "First you’ll want to download a keyboard programming app like VIA, plug your keyboard into your computer, take a pair of tweezers, and test each point of key circuitry on your PCB plate."
Precision measuring and safety tools pay off. The Wuque FR4 ruler is recommended for delicate layout checks: "The Wuque FR4 ruler is designed to provide precise and accurate measurements in centimeters. The ruler is made from FR4, the same material used for manufacturing PCBs. This ensures compatibility and preserves the integrity of your delicate PCB." Pair that with diagnostics: "Use your multimeter to measure properties like voltage, current, and resistance and prevent underloading or overloading your keyboard circuit. Also use it to troubleshoot and test your PCBs, switches and other components to identify problems with keyboard build, such as short or open circuits."
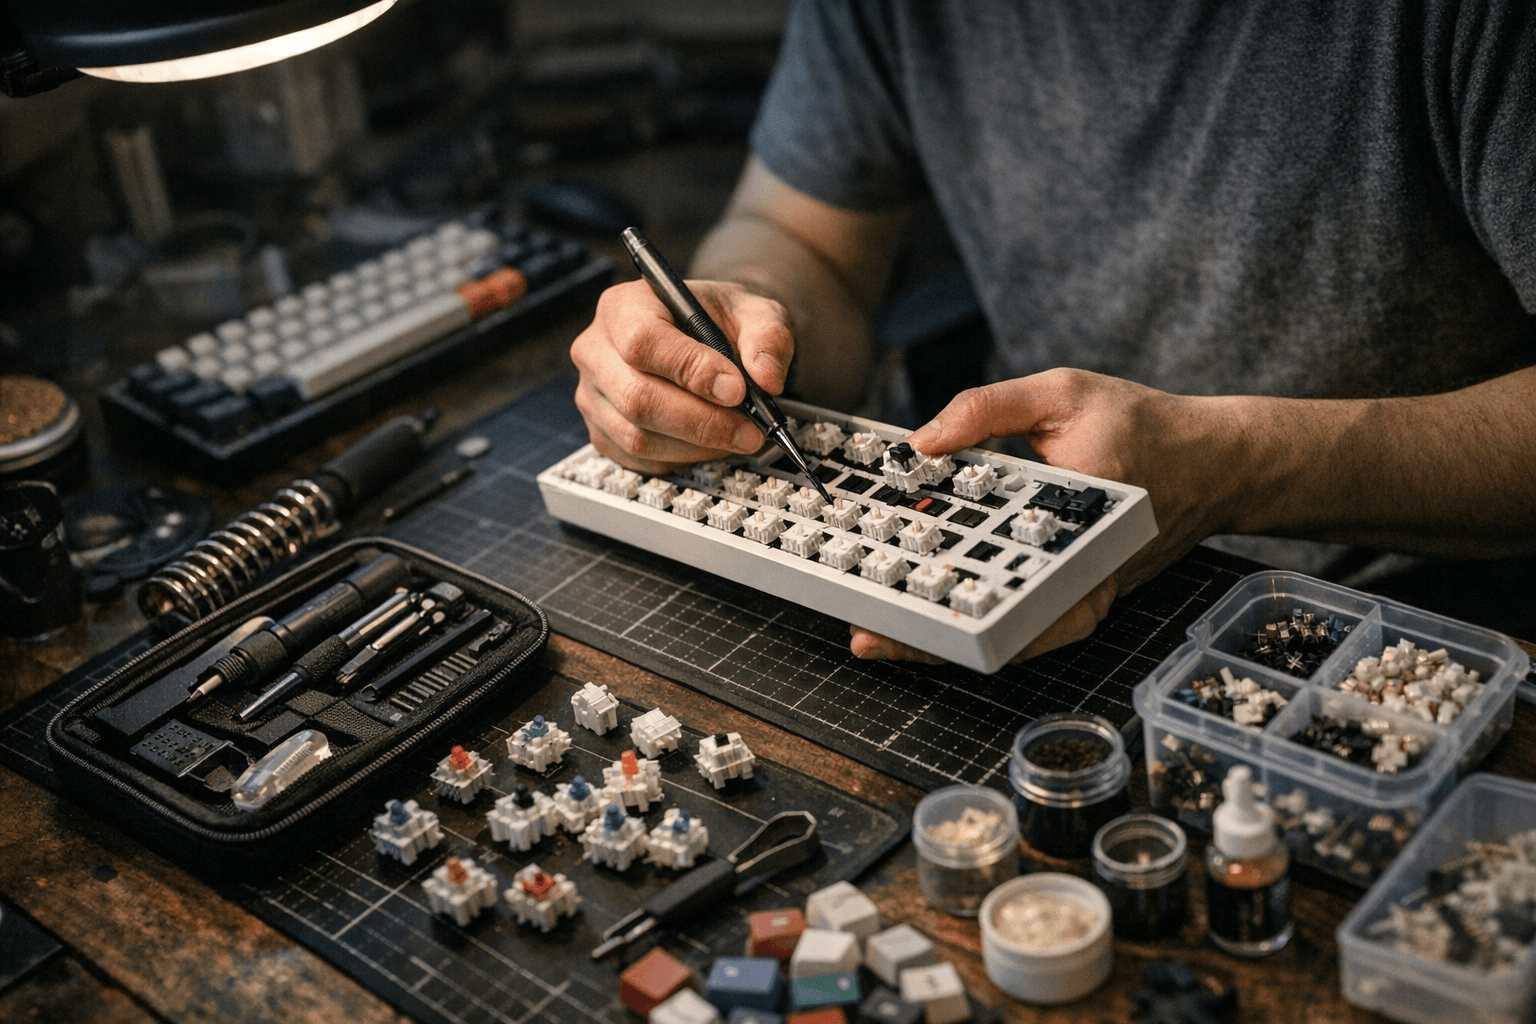
Plan your parts around a layout choice: "Pick a size and layout first, 60%, 65%, 75%, TKL, or 100%, because that choice dictates case, PCB, plate, and keycap needs." That decision informs switch type (linear, tactile, clicky), keycap material and profile (ABS vs PBT; Cherry, OEM, SA), and whether you’ll budget for foam, switch films, or tape to tune acoustics. Lubing stabilizers and switches is a high-impact mod; Khstats walks through the sequence of lubing stabilizers, installing stabilizers and switches, and finishing with the case: "Stack and screw, Once all your keys’ electrical connections work, you can add your key caps. Finally, stack all the pieces together (case, foam plate, plate/PCB/switches/keys) and tighten the necessary screws." Then, as Khstats cheerfully puts it, "Type away, Enjoy the click-clack of your brand new custom mechanical keyboard!"
You do not need every specialty tool on day one. As Kineticlabs notes, "This is just a checklist of tools that make building keyboards highly comfortable and exciting. You don't have to have all of them as the most essential tools have already been highlighted." Treat the checklist as a roadmap: secure the precision basics, confirm PCB function with VIA, choose hot-swap to avoid immediate soldering, and add measuring and lubing tools as your builds get bolder. With that sequence you avoid common pitfalls, limit GAS, and get to the satisfying part fast, typing on a board you built yourself.
Know something we missed? Have a correction or additional information?
Submit a Tip