Statistical Tuning Removes 3D Print Ironing, Matches Top-Layer Quality
Hackaday reports a test‑driven method from [Make Wonderful Things] that tunes line width, flow ratio and speed to skip slicer ironing — the demo saved about 34% print time while matching top‑layer quality.

1. The claim and why it matters
Hackaday published a practical how‑to on Feb. 25, 2026 summarizing a demonstration by [Make Wonderful Things] that “asserts that you don’t need to do this time‑consuming step.” In the video-backed demo, statistical tuning of slicer settings aimed to place the top layer correctly the first time, and Hackaday reports the best non‑ironed pieces “looked as good as the one that used traditional ironing.” The payoff Hackaday highlights: “Compared to ironing, the non‑ironed parts saved about 34% of print time.”
2. What ironing is — short technical definition
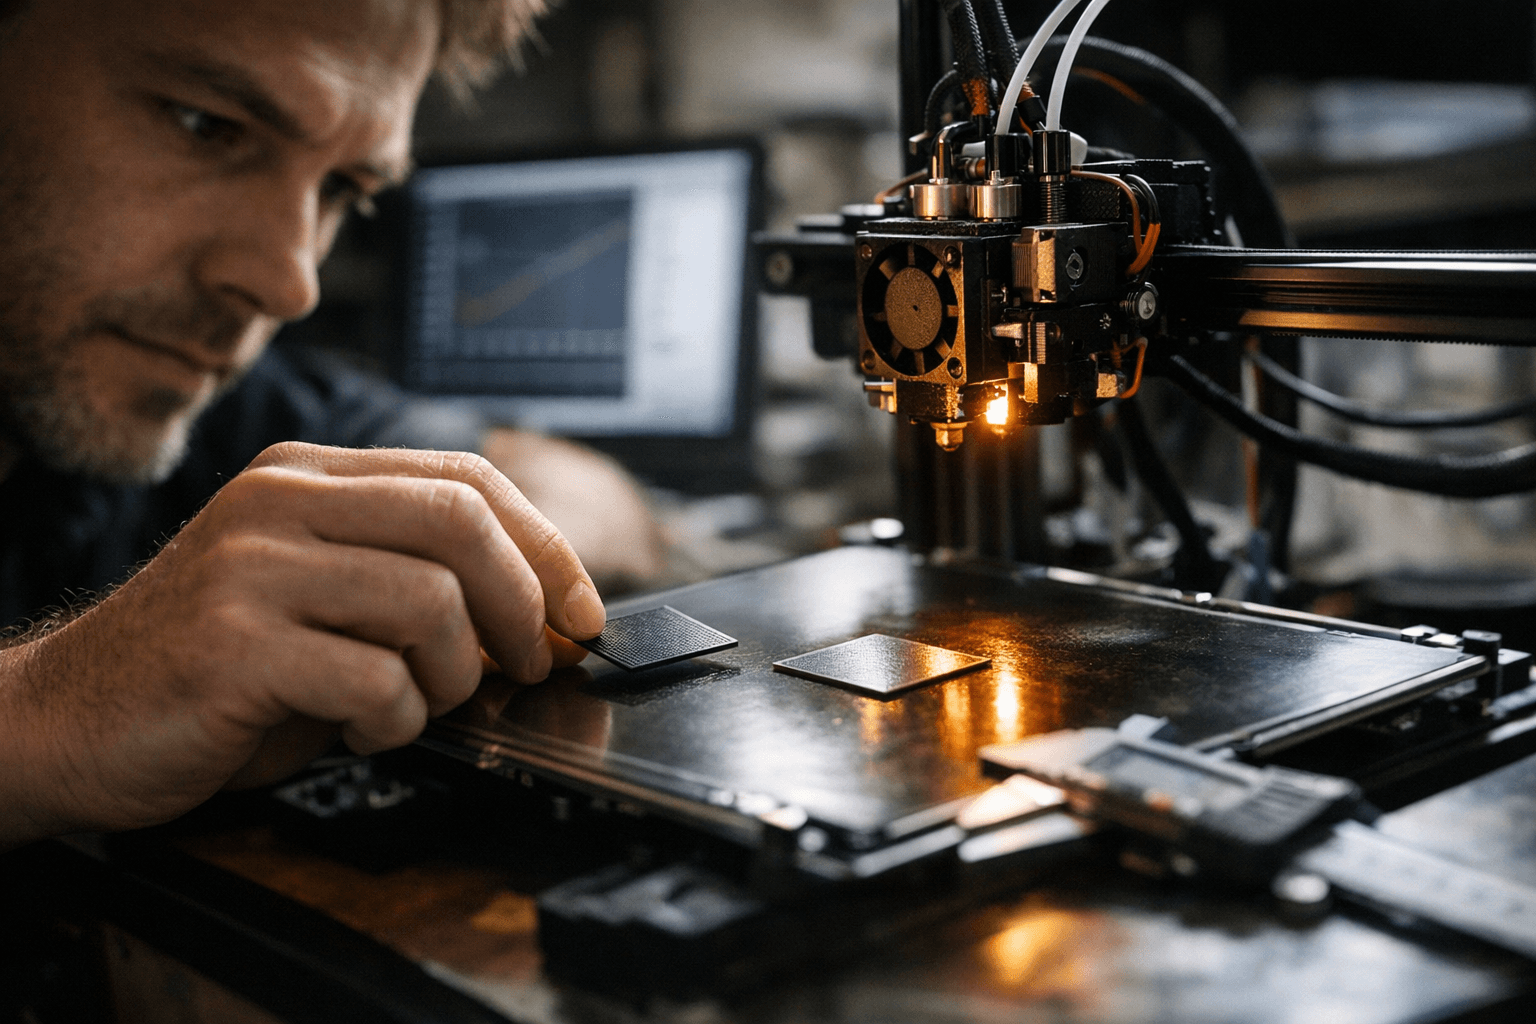
“If you want smooth top surfaces on your 3D printed parts, a common technique is to turn on ironing in your slicer.” The article preserves Hackaday’s plain description: “This causes the head to drag through the top of the part, emitting a small amount of plastic to smooth the surface.” It’s a simple but slow post‑pass that many of us enable when cosmetic top surfaces matter.
3. The three parameters the presenter targeted
The presenter singled out three slicer knobs that “make a difference”: line width, flow ratio, and print speed. These are high leverage because they directly change how much plastic is extruded and how it’s laid down at the top surface; small tweaks alter bead packing and heat history, which is precisely what ironing attempts to correct after the fact.
4. How the search explodes: 19,200 combinations
Using “reasonable step sizes” for those three variables produced an initial combinatorial space of 19,200 combinations of settings to test — which Hackaday notes: “Picking reasonable step sizes suggested that there were 19,200 combinations of settings to test.” That number is the practical problem: an exhaustive grid would be prohibitive in machine time, filament and wear, so you need a smarter test plan.
5. The statistical approach used to cut the work
To tame the combinatorics, the presenter “picked up techniques from famous mathematician [George E. P. Box]” and “also used Bayesian analysis to reduce the amount of printing required to converge on the perfect settings.” In other words, the workflow combined classical designed‑experiment thinking with an adaptive, probabilistic optimizer so you don’t print every cell in the grid — you print the informative ones.
6. What Hackaday saw in the evidence
Hackaday summarizes the outcome plainly: “Judging from the video, it appears to have done so. The best test pieces looked as good as the one that used traditional ironing. Compared to ironing, the non‑ironed parts saved about 34% of print time. Not bad.” The visual parity claim is based on the presenter’s video; the saved time is reported as an observed figure for that demonstration, not a broad claim about every geometry and printer.
7. Community reaction and healthy skepticism
The Hackaday post reproduced reader comments that push back on the generality of the result. Comments included skepticism such as “Saves 34% of print time? [...] Saves 34% of print time?” and the blunt “Shenanigans!” One commenter drilled into a realistic conditional: “Only if the print has two layers and the optimal speed is unchanged from the control. Otherwise the result wouldn’t be so ’round’, when expressed as a fraction.” Others noted practical variability: “all top layers are not equal,” and that sometimes makers still “wind up using a knife to level off the tiny peaks at each U-turn.”
8. What is explicitly documented and what isn’t
Hackaday gives a clear list of what is known: date (Feb. 25, 2026), presenter ([Make Wonderful Things]), parameters (line width, flow ratio, print speed), the initial grid size (19,200), the statistical references (George E. P. Box and Bayesian analysis), the video evidence, and the reported ~34% time saving. What isn’t in the article are exact numeric ranges, step sizes, the precise Bayesian model or priors, how many prints remained after the statistical reduction, or the printer/slicer/filament specifics used in the demo.
- Choose the three knobs: line width, flow ratio, print speed. Don’t add extra variables — you’ll explode the search again.
- Define “reasonable step sizes” for your hardware — coarse first, then refine around promising settings. Expect the initial grid to balloon if you use fine steps (Hackaday’s thought experiment hit 19,200 combos).
- Use an experimental‑design approach (Box methods are cited in the demo) to pick informative combinations rather than full grids, then apply a Bayesian optimizer to choose the next runs adaptively. You’ll need a test‑part you can evaluate visually and a consistent print log so you can compare durations.
- Keep an ironed control run to compare appearance and total print time; Hackaday’s demo reported about 34% time savings for the non‑ironed case, but that figure is conditional on the demo’s geometry and setup.
9. Practical, low‑risk way to try this on your bench
If you want to experiment, follow this safe sequence:
This isn’t a plug‑and‑play recipe (the demo didn’t publish exact ranges), but it’s the minimal practical workflow to explore the claim on your machine.
- the full experimental protocol and step sizes used,
- the raw images and print logs that support the “looked as good as” judgment,
- the exact Bayesian model, priors, convergence criteria, and stopping rules,
- the printer, nozzle, filament, layer height, slicer and version, and the number of top layers in the test part.
10. Verification checklist for anyone reporting or reproducing these results
If you want journalistic or experimental rigor, gather these items before calling it a general replacement for ironing:
Hackaday itself notes “Of course, there are variations on traditional ironing, so your results may vary,” and the community comments highlight geometry and layer‑count dependencies explicitly.
11. My take as a practical maker
I’ve spent too many hours watching ironing passes, so the idea of replacing that pass with smarter upfront tuning is immediately attractive. The demo Hackaday summarizes is promising because it marries experimental design with Bayesian efficiency — two things that save real machine time when you do them right. But the 34% figure is an observed outcome from a single demonstration; the sensible move is to treat this as a method to try on your critical parts, not a universal setting you drop into every slicer profile.
12. Final point: what this changes
Statistical tuning offers a realistic path to cut wasted head time while keeping top‑layer quality if you’re willing to invest in a measured tuning phase. Hackaday’s writeup gives a concrete starting point — line width, flow ratio, print speed — and a real warning about scale (19,200 combinations) that motivates using Box‑style design plus Bayesian reduction. If the technique holds up across printers and geometries, the payoff is straightforward: fewer ironing passes, more printer uptime, and faster iteration.
Know something we missed? Have a correction or additional information?
Submit a Tip